Lighting up my world with a personalised, one-of-a-kind DIY candle
A junior reporter found out about the joys of making her own candle from scratch at a three-and-a-half-hour workshop

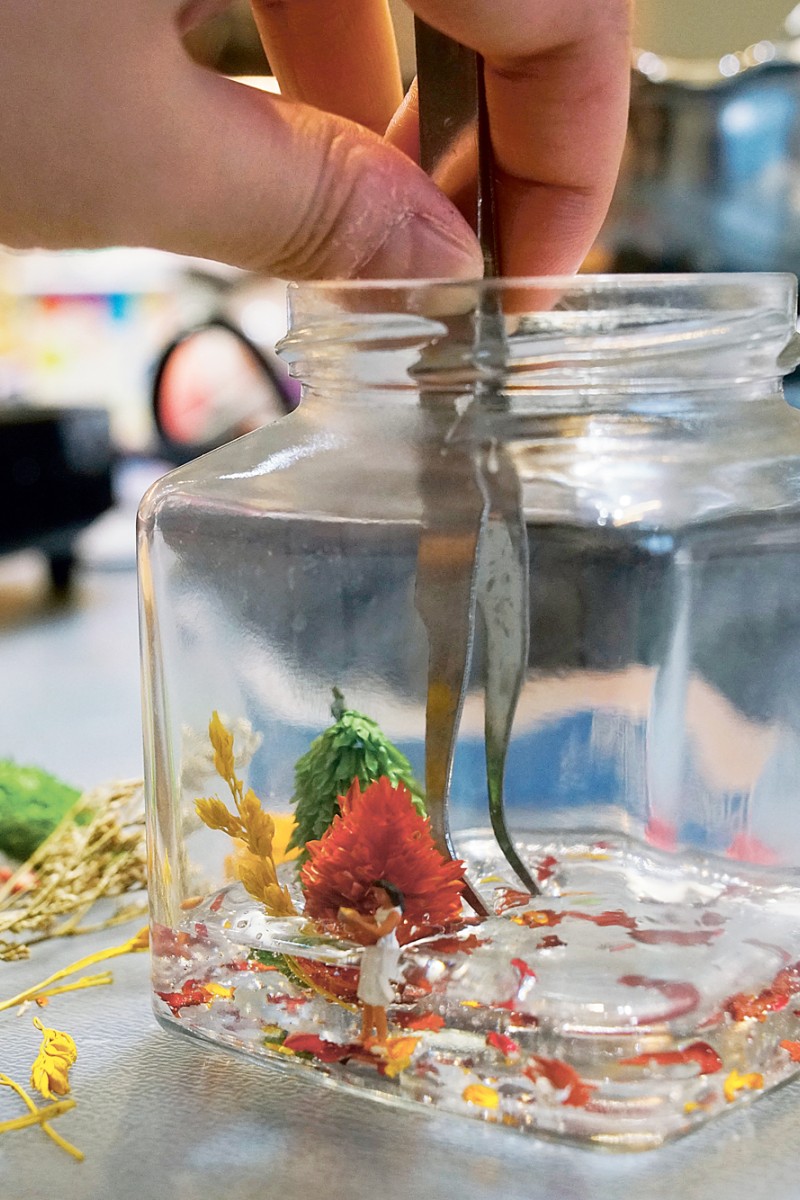
 The delicate process of personalising my very own candle!
I walked into my candle-making workshop expecting to be in and out of the Fo Tan-based factory building in 45 minutes. Catrina Cheng, the founder of arts and crafts shop Make Your Day (and my candle workshop instructor for the day), cheerfully told me I could expect to be in my seat for three-and-a-half-hours.
Cheng’s workshop is filled with candles, each prettier and more interesting than the last. Some look like what you would expect any candle to look like; others are in the shape of the planets in space, or contain miniature scenes.
I asked Cheng if she ever finds it boring teaching people how to make candles. I mean, each workshop lasts anywhere between three and four hours! Cheng told me she doesn’t, because everyone has a story behind the candle they make, and that is what makes it interesting.
“A lot of the times, people come and make something to celebrate a birthday, or a wedding anniversary,” Cheng said. “Once, this man came in and recreated a place that he had always wanted to go to, but had never been to because of his disability.”
My candle had to contain a miniature scene, and the materials I had to work with came from lots of different countries. The jelly wax came from Japan. The tiny human figures were made in Germany. The flowers were real flowers, dried and cut up into tiny pieces.
Cheng asked me to think up a theme and a scene for my candle. As I was coming up with ideas, I poured the jelly wax into a pot to heat up on a mini induction plate. Once it was melted, I poured the liquid wax into a mug to cool a little.
I sprinkled some leaves and flowers into a glass jar and, when the wax was cool enough, poured a little wax over them. This helps to keep the leaves in place when you start adding more stuff to the candle.
I used tweezers to set down more leaves that would look like trees and bushes, as well as my little human figure.
“Try to keep the temperature between 75-80 degrees Celsius,” Cheng told me. “You have to make sure that the next layer of wax you put in won’t affect the previous layer.”
Keeping things at the right temperature is very important when you make a candle like this: you want to put your decorations into the jar when the jelly wax is squishy. Too runny, and your decorations will fall over. Too solid, and you won’t be able to plant them in a layer at all.
I repeated this layering process many times, each time adding a little more decoration to my candle. My candle ended up looking like an autumn scene, with leaves dancing and blowing in the air. I topped off my candle with a purple wax. This isn’t like the clear jelly wax, and melts at a different temperature to the jelly wax.
Cheng told me this is because when I use the candle, only the purple layer will melt. The clear jelly wax layer, which took me hours to create, has a higher melting point, and it won’t be ruined. That means if I want, I will be able to reuse my candle again and again!
Edited by Ginny Wong