- Night photography can be a nightmare. But not to fear; here is how to capture those perfect neon sign shots you see on Instagram
- Take your photography to new heights with these tips
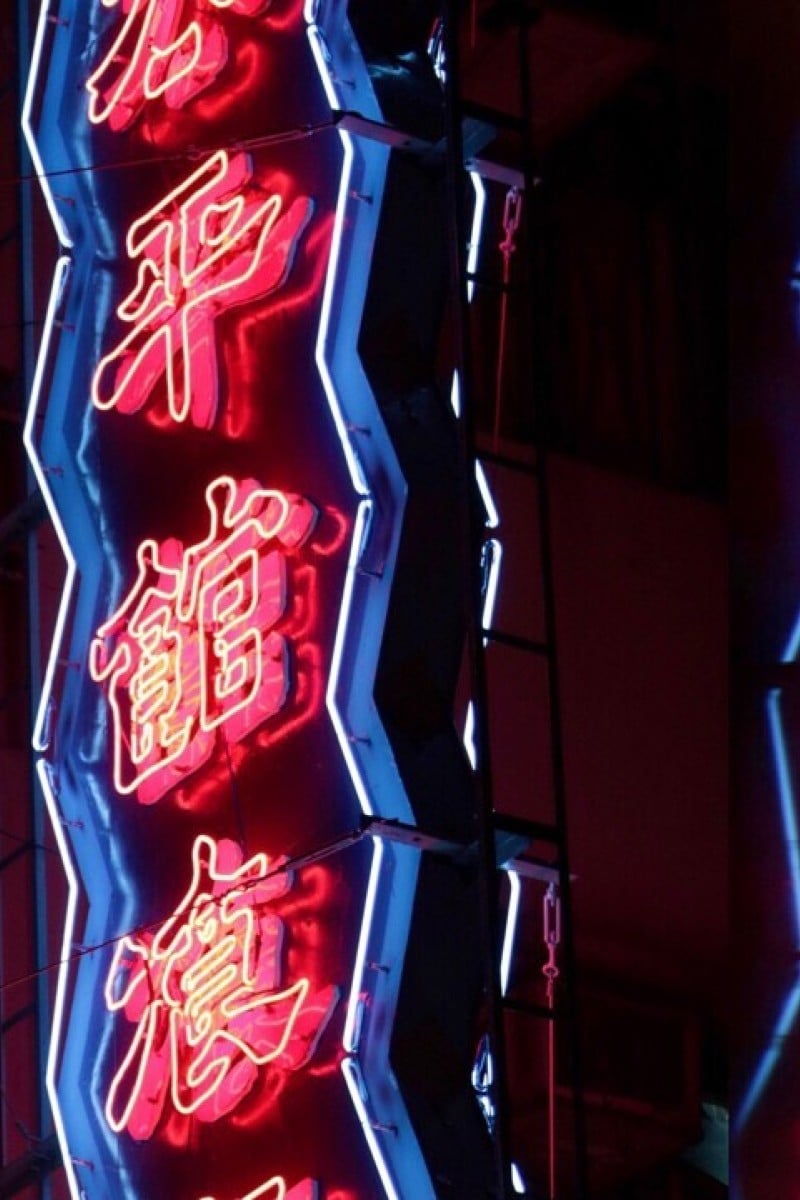
 neon photography by Natalie Kainz, King George V School photo by Natalie Kainz
Hong Kong lures in photographers from all across the globe like flies to a light with the wealth of neon signs that hang from the city’s clustered buildings. However, taking pictures of neon lights isn’t an easy task. You need to know how to work in low light, have the patience for post-processing, not to mention a great deal of creativity. If you’re looking to preserve your own slice of Hong Kong’s neon cityscape grab your best gear and follow these five simple tips and tricks.
Bring along some props
Making a picture of a sign look interesting can take a little more than just an intriguing angle. Sometimes, you need to a prop to spice up your shot. Try holding the reflective side of a CD up to your lens. You might have to play around with the angle of the disk, but once you get it in the right position, you’ll get a burst of colour which will fill up the blank space in your image. For a more sophisticated look, you could buy a glass prism off eBay or Amazon. Prisms refract light so they can create rainbows and flares that can give your photo a really cool effect. If you’re taking portrait photos of a model, ask them to put on a pair of glasses. The light from the surrounding neon signs will bounce off the glass, drawing your audience into the picture. If all else fails, use the reflective surfaces around you; anything from shop windows to puddles on the floor can turn an ordinary photo into something spectacular.
7 photography tips for taking professional photos with your smartphone
Underexpose your shot
The brightness of neon signs in contrast to the darkness can make it tempting to turn up the exposure on your camera. Don’t fall for this trap! Instead, underexpose your photo slightly and bring up the details later in editing. This will allow you to maintain a low ISO, capture more detail, and minimise grain, while preserving the colour and highlights of the image.
If you’re using a phone that doesn’t let you adjust the ISO, tap on a part of the image that seems to be in the middle of the darkest and brightest parts of your image. This will make your phone adjust to mid-brightness and give you the same freedom to play around with light that a DSLR would.
Pick a neon sign before heading out
Scout your favourite neon signs before you go on a photography trip. It can be difficult to find the sign that you want in the dark because Hong Kong is saturated with lights of every kind. Yau Ma Tei, Tsim Sha Tsui, Mong Kok, Wan Chai and Central are packed with great signs but don’t be afraid to venture off the beaten road. Lesser known areas, like fishing villages and small restaurants, can have some unique and interesting signs, too.
How and where to take photos of the stars in Hong Kong and tips from an award-winning pro
Post-processing is key
Neon signs come in all sorts of funky colours and designs. After you’re happy with your shot, don’t stop there. Import your photo into Lightroom, Photoshop or any other photo editing software and play around with colour curves, highlights and lowlights until you reach the colour scheme that you’re looking for. If your camera gives you the option to shoot in RAW format, that’ll give you even more freedom to adjust colours and brightness. If you followed the second tip, you’ll be able to brighten the shadows or enhance the highlights to bring all the detail and colour back.
Find some inspiration
Creativity doesn’t exist in a vacuum and neither should your photography. Take to Instagram, Facebook and Tumblr to find examples and tutorials of other people’s neon sign pics. Instagrammers who we consider to be quite the neon connoisseurs include: @brandonwoelfel, @gabpolitely, @edwardkb, @neonuni and @queenxx_photog.